Content provided by Propper
Body armor needs to fit the individual wearer for maximum coverage and comfort. Anyone who has ever worn an ill-fitting vest can attest to this. Have you ever sat down in your patrol car and the front panel punched you in the throat? That vest doesn’t fit right.
A vest that does not fit correctly may not cover essential areas and therefore not offer the level of protection it is designed to offer. For example, panels on a two-piece clamshell vest that are too small may leave a dangerous gap along the side that could allow a bullet to sneak through. Likewise, panels that are too big are uncomfortable and may discourage the officer from wearing the vest at all. And we all know a vest doesn’t offer any protection on the street if it’s hanging in the closet at home. To encourage officers to wear their body armor, it needs to fit right.
Aside from being too hot in the summer, the biggest complaint officers have about armor is it’s uncomfortable. But it doesn’t have to be.
Measuring for a vest is not difficult. Most vest manufacturers provide guidelines and a comprehensive form detailing all the required measurements, with blanks to fill in the lengths. Each vest is a little different, but here is a general example for measuring provided by Propper.
Step 1: Get a Partner
For maximum accuracy, have someone else measure you. While it’s possible to measure yourself, the results will be far more accurate if you serve as the model and let someone else hold the tape measure. Use a flexible tape measure like a suit tailor would use. This allows for easier wrapping around key measuring points. Remember, you want your armor to fit snuggly and contour to your body for maximum concealability, comfort, and protection. This requires accurate measurements.
Step 2: Suit Up
Since you will wear the armor on duty, strap on your duty belt with all its gear – holster with empty gun, mag pouches, etc. – and position it where you normally would when on the job. Leaving it off will cause inaccurate measurements – typically too long – resulting in a vest that rides up when you sit.
Step 3: Hands Up
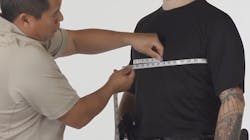
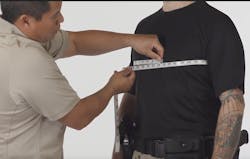
For the first measurement, raise your arms out to the sides so your partner can wrap the measuring tape around your back and chest, overlapping in front. Drop your arms to your sides and read the tape. If you are between inches (such as 41 ¼, for example), round up to the nearest inch, in this case 42.
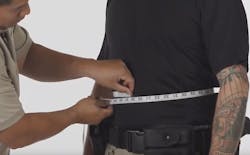
This way the vest will not be too tight. Repeat this process around the widest part of the waist and round up if between inches.
Step 4: Take a Seat
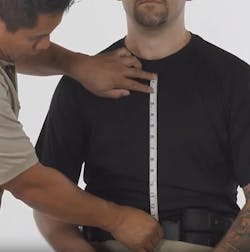
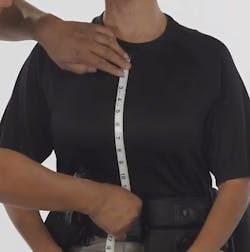
To prevent the front panel from riding up under your chin, measure the front dimension in a sitting position, with the same posture as you would have in your patrol vehicle. Place the end of the tape at the notch above your sternum and measure down to one inch above the duty belt. For this measurement, round down if between inches.
Step 5: Turn and Face Away
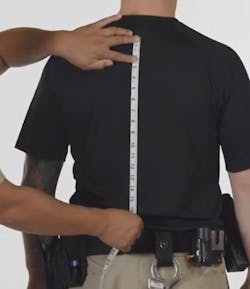
For the back panel, turn around and have your partner measure from the top of your shoulder blade to one inch above your duty belt, rounding down if between inches to ensure the panel will not be too long.
Step 6: Side Job
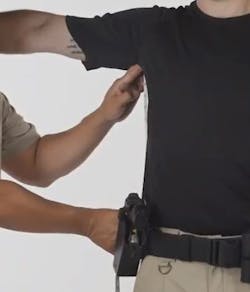
The last measurement is your side, especially important if you’re choosing a four-panel vest, such as Propper’s 4PV, but this also applies to traditional two-panel vests. Stand with either arm stretched out to the side and measure from the armpit down to one inch above your duty belt, once again rounding down if between inches.
Female Officers
All of these measurements are the same for male and female officers except one: When measuring the length, do not press the tape between the bust or the vest will be too tight and too short.
When it comes to concealed armor, one size most definitely does not fit all. A vest should be measured and cut to the individual officer who is wearing it. This requires detailed measurements, which may seem like an unnecessary step, but the officer’s life could depend on it.
