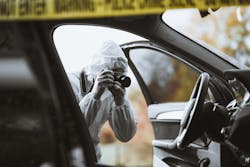
Forensic photography is not snapshot photography.
It’s intentionally not artful. It isn’t intended to show things in their best light. Done properly, it shows things exactly as they are. In court, that’s called a “true and accurate representation” of the subject.
Police Photography is an essential task for crime scene documentation, yet is rarely mastered. Investigators tend to rely on the camera’s auto mode with little thought given to what that entails. Auto mode may produce visually pleasing images, but it does not necessarily provide a true and accurate depiction of the subject.
Auto mode is intended for amateur photographers who do not wish to have any control over their images. Proper exposure, white balance, depth of field – all critical aspects of forensic photography – are determined by the camera, which is programmed to be kept handheld. This means the camera will typically choose a wide-open aperture and a high ISO. The result is poor depth of field and potentially grainy photographs.
Manual mode resides at the other end of the spectrum. The camera provides exposure feedback from its light meter, but the photographer controls all settings. The camera will take a “bad” picture if the photographer fails to understand the camera’s feedback or basic concepts of photography. Mention manual mode in any police photography class, and you’ll be greeted by a chorus of groans. This is mostly due to fear of the unknown. Once students begin to grasp the interplay of aperture, shutter, and ISO, they tend to favor manual mode – at least in class.
Sandwiched between auto and manual modes are aperture- and shutter-priority modes. These modes allow the photographer to select an aperture or shutter speed while the camera supplies the missing variable. Most forensic photography can be accomplished in one of the priority modes with the occasional reversion to manual mode. This assures efficient shooting while maximizing image quality and depth of field.
I occasionally teach a one-day forensic photography review course for law enforcement. Camera mode selection is just one of the many topics I cover to help officers become more confident forensic photographers, but it is definitely a critical topic. Learn more about other important themes in forensic photography, in parts two and three of this blog series.
Looking for additional information on police photography, or to sharpen your photography skills? L-Tron offers a Forensic Photography Refresher course, geared towards escaping manual mode. For more information & to receive information on our next course, visit: L-Tron.com/into-forensic-photography-course
Andy McNeill is a retired Sheriff’s Deputy and L-Tron’s Director of Forensic Education. With over 20 years of experience in Law Enforcement, Andy is an ACTAR-accredited collision reconstructionist, IAI-certified Senior Crime Scene Analyst, and a NYS-certified police instructor. In his spare time, Andy enjoys kickboxing, traveling and photography.


